Showing posts with label babies. Show all posts

February 27, 2016

Turkey, Potato, Carrot Baby Food

I really enjoy making baby food. There is just something that makes my heart swell with joy knowing that I am making yummy, healthy food for my little baby. 

But my first little Bug moved on to table food when he was 7 1/2 months old!  Way too soon for me and I had a whole freezer full of food! :(

So when Sunshine arrived on the scene, I really wanted him to like baby food better than Bug did!  I decided to make yummy, well seasoned, and interesting baby food so he would stick with it longer! And it did work, Sunshine ate baby food until about 8 1/2 months!  Not, much longer, but I'll take it! ;)

Here is one of Sunshine's favorite recipes I made...

Turkey, Potato, Carrot Baby Food
I had just made a turkey, so I made some into baby food.  This is just what I did. I'm sure you can do this many different ways and it will still taste great!

1/4 pound cooked turkey - I used mostly dark meat so it was juicy
3 potatoes
4 carrots
Onions from the turkey
Enough turkey broth to cook in

Boil and carrots and potatoes and onion in the turkey broth.  I added a little water to it also, but it was mostly broth.

Once the potatoes and carrots are soft, add in the turkey meat and let it simmer for about five minutes.


Then dump it in the food processor or blender and add the water/broth to make it the desired consistency.


Once blended, spoon it into ice cube trays to freeze. Once they are frozen, crack them out of they trays and put into freezer Zip-lock bags and label!

When your baby is ready to enjoy, just take out a cube or two and warm them up!  I just know your baby will love it! :)

June 6, 2015

Yeast Diaper Rash and How to Treat it Naturally

My little Sunshine has a yeast diaper rash!  It is no fun to be a mommy and see your little one have something wrong! :(

I generally use cloth diapers, but I was having gall bladder surgery, and thought it would just be easier to use disposables during the surgery time when the kiddos would be taken care of by family, and then also once we got back home and I was recovering.  I decided to use up some cheap off brand (Up & Up) diapers I had gotten as a gift when Bug was a baby because I was tired of having them around the house.  My Sunshine's bum was getting red so I put some diaper rash cream on it, but it seemed to be getting worse, not better.  Then, it was kind of looking like dry skin, so I put some healing lotion on it.  That wasn't helping.  I went back to cloth, which made it stop getting worse, but it wasn't helping it get better.  I tried coconut oil and tea tree oil... guess what, not working!  I was at a loss!  I had Sunshine's 2 month check up a few days after I felt like I had tried all my options, so I waited to see what the doctor had to say until then.  

So I go to the doctor and talk about everything I had tried to heal the rash. Then he opens up Sunshine's diaper and immediately said, that's a yeast infection!  He asked me some questions and we figured it was just a diaper rash that got infected by yeast in his poo and turned into a yeast infection. 

The doctor gives me a prescription for Nystatin.  I go home, thinking this is going to just clear it all up and we can be done with this!  Well it wasn't working, and it still wasn't working, and you guessed it, not working still after using it for a week and a day.  Boy was I frustrated!  It was going on about three weeks total that Sunshine had had a diaper rash/yeast infection! The doctor said if it wasn't better in two weeks, to come back.  But I knew he would just give me another kind of cream and I didn't really want just another cream.  

So I turned to my friend the Internet to try to find some homemade and natural remedies.  And this is what I found...

Homemade diaper yeast infection rememdy that's cloth dafe and all natural. Easy to make and clears up the rash completely in a couple of days | ALLterNATIVElearning

This website is awesome!  But this recipe for yeast diaper rash cream is even more awesome!

I mixed up a double batch and started using it right away!  I have been using it for three days, and the yeast infection is starting to clear up!  I am sold on this!  I think the most important thing is that I got raw and unrefined coconut oil.  I'm not sure if you can just get that in the regular coconut oil area at a Wal-Mart type store, because when I bought my first jar of coconut oil, I was looking for refined so it wouldn't smell like coconut.  And since I had to go to the natural health shop for the grapefruit seed extract, I just picked some up there.  I also get my infant probiotics at a natural health food store.


Here is the recipe from the website that I linked above...

1 Tablespoon raw and unrefined coconut oil.
1/2 Teaspoon powder probiotics
About 20 drops of Grapefruit Seed Extract 
2-3 drops essential oil - Lavender or Roman Chamomile 

Like I said, I doubled the recipe so I wouldn't have to mix it up again super fast.  I also did not add an essential oil.  I might have added lavender if my essential oils had come in the mail before I made this, but I am new to the essential oil world and after going back and forth on whether or not they are necessary, I finally ordered some!  

I have continued to give my Sunshine his daily dose of probiotics. I have just been way more intentional about it, because honestly, some days around here are crazy and I forget to give it to my kiddos! :(

I also have been using disposables while treating this infection.  Cloth holds moisture right next to the bum, which helps yeast to grow (they like it warm and moist!).  Disposables wick moisture away from the bum.  I have been using a sensitive type of diaper, and while I would rather be using cloth, I think this has also helped in the healing process.  

Another thing I have been doing is letting Sunshine's bum air out.  I was kind of freaked out about letting him go without a diaper, but once I tried it, it really wasn't that bad.  In fact, more times than not, he doesn't even pee!  I just put him on a towel and we do tummy time for a bit.  Then, when he gets tired of that, I hold him sitting up and he just sits there looking around the room.  After I air him out, I definitely see an improvement in the rash.  

One thing to remember, and not get too discouraged about, is night time.  Right now, my Sunshine is sleeping for about 4-5 hours at a time.  Which means a wet diaper is on him for that amount of time.  So in the morning, it is going to look worse than it did when you put the baby to bed.  But if you keep up with the cream, airing out time, and lots of diaper changes through out the day, it will help the nights from getting so bad!  

I hope this works for you like it did for us!  It really was a sanity saver for this worried momma who didn't know what else to do!  It it so reassuring to know that the infection is on the downswing and I am using products that are safe and natural for my baby!

Cassandra :)

An update - A day after I wrote this post, I got a super bad ear infection.  I had to start taking antibiotics, and antibiotics make yeast infections flare up.  So I called the doctor because Sunshine's bum wasn't getting any worse, but it wasn't getting better like it had been.  He told me to just get some Monistat cream from over the counter.  I have been using that and it is slowly getting better, but I know the antibiotics I am taking are making the healing process so much slower!  

I just wanted to say that because of this silly ear infection, I was not able to see if the cream I made above of coconut oil, etc. really did work to totally clear up the yeast rash.  


May 19, 2015

Cloth Diaper Wipes Spray

So it's been a while... again...
And without going into a lot of details, let's just say that my life has been a roller coaster of sickness (nauseous all pregnancy), moving, sickness (more nauseous all pregnancy), having a baby, taking care of a baby and 18 month old, getting used to being a farmer's wife, and then having gallbladder pain and then eventually surgery while still taking care of my two kiddos, life has been a little overwhelming at times!

But I have gotten back into cloth diapering.  I quit cloth diapering when my Bug was about 10 months old.  I felt awful putting the chemicals on his bum, but with how nauseous I was all pregnancy, I could not handle cleaning out poopy diapers and putting diapers that had been in the pail all day into the laundry.  The smell literally made me throw-up!  But now that that's all over, and my newborn had EXTREMELY bad diaper rash, I am back to using them again!

While I was on a cloth diapering hiatus, I have gotten a little more into the world of natural things and chemical free living.  I have started using Melaleuca products and it has made me more aware of all the junk we put in and on our bodies.

So when I made cloth diaper wipes spray, I used my chemical free products to make it.  With the exception on the Baby Oil, that was still Johnson and Johnson.  I also want to say that there is nothing wrong if you use Johnson and Johnson.  I thought more natural things were so expensive and not really worth it, but then I found the Melaleuca Company and got chemical free, natural products for cheaper than you can get in the store.  But don't beat yourself up if you do use the regular stuff!

Here is how I make my cloth wipes spray:

1 cup water (boiled to get bacteria, etc. out and make the water last longer if you are making a large batch)
1 TBSP Baby Oil with Vitamin E
1 TBSP Baby Soap
1 TBSP Baby Lotion (This can be left out)
6 Drops Tea-Tree Oil (Melaleuca Oil)

I usually make 4 to 6 cups at a time and keep it in a sealed container.  I fill a spray bottle with the solution and then spray the wipes as I need them.


I thought I had already written about this, but I couldn't find anything on it when I looked earlier, so I'm writing about it now!  But if it is somewhere else and you are reading about this again, sorry! :)

Also, for those of you on the fence about using cloth wipes because you might thing it is gross, just try it!  I thought the same thing and it was way more hassle using disposable wipes and cloth diapers.  And cloth wipes work so much better than disposable ones!  I just use some cut up pieces of fleece squares and they work AWESOME!!  Just try it, I know you will love them!

But I am so glad that life is getting back to "normal" and I have time and energy to blog again! 

Looking forward to chatting with you soon!
Cassandra :)

May 21, 2014

Sunning Cloth Diapers

My cloth diapers have taken a beating the past week (I'll leave that to your imagination) :) 

They were totally stained!  Because it is finally getting nice and sunny in our neck of the woods, I decided to try "sunning" my diapers.

It is so easy and it WORKED!!!

All I did was wash my diapers like normal, but then instead of throwing them in the dryer, I put them on my laundry rack to dry in the sun.


The sun basically acts as a natural bleach and it takes the stains out.


Once the diapers were dry, I did toss them in the dryer for a few minutes because they were all crunchy from drying in the sun.  But just a few minutes was all they needed  and they were soft and fluffy!

I most likely won't do this very often, just when my diapers are needing a good whitening.  I always am waiting until the last minute to wash diapers, and I don't see that changing in the future.  I don't have time to let diapers dry outside all day long.  But I do love the energy saving of not using the dryer, so we'll just have to see how it goes! :)

Happy Cloth Diapering!
Cassandra :)

May 20, 2014

Crying It Out...

This past week I did something I thought I would NEVER do.  I let my little Love Bug cry it out to go back to sleep.  I was VERY sure I would never do this, but two things made it very apparent that I needed to do this...

1.  Bug was waking up every 45 minutes to an hour and just wanted to be cuddled back to sleep.  If I did try to nurse him, he would eat for about 30 seconds and fall asleep.  

2.  I was having a conversation with my aunt about Bug's sleeping habits and I started crying... a lot and unstoppable because I was SO exhausted and knew something needed to change!

So I guess the main reason why I never thought I could do cry it out was because I am a nurturer, I like to meet people's needs, especially my little Bugs and it hurts my heart so bad to hear him cry.  But like I said above, something needed to change. 

To make a long story short, I will give you the time line of events that brought this to be...

**April 4th - we started Bug on probiotics and he was sleeping for about 3 to 5 hours at a time at night.  GREAT!  I could handle that!
**April 15th - Bug gets his 6 month shots and a few days later catches Daddy's cold because of his weakened immune system.  
**The next few days are awful!  The first cold for my Bug was so hard on me because I couldn't help him!
**He is sick for a while... around a week and a half.
**He's better by the last few days of April, but his sleeping is HORRIBLE because I spoiled him while he was sick.  I knew I had to do something, but we were leaving for Arizona in a few days, and I knew things would be different and habits would change, so I just suffered through it.

We get to Arizona and his sleeping is obviously still awful!  This is where the conversation with my aunt happened and let me tell you it was HARD to hear!

I was DEAD set against crying it out, but I guess it's because I didn't know what would happen.  I just imagined my baby crying and crying and thinking his mommy didn't love him anymore.  

But she told me exactly what happened with her baby 14 years ago.  She said her baby was very much like Bug in personality and habits and she finally had to do something. 
Here is what happened at our house with crying it out...

Night one - I nursed and put Bug to be like usual around 9:30.  He nursed a long time, and I knew he should not be eating before 2 AM.  In my mind I knew he would not starve to death waiting 4 and a half hours to eat.  I needed to have that goal in my head, because I think it would have been harder for me to let him cry when he woke up around midnight. When he woke up, Bug cried for 47 minutes, he stopped for about 5, and then cried for about 10 more.  He fell asleep and slept from 1 to 7:30 the next morning.

I will say the only reason I was able to let him cry as long as I did was because my husband is AMAZING and kept reassuring me it would all be okay.  He basically had to hold me down in bed.  Not forcefully, but he had his arms snuggled around me. 

Night two - I nursed Bug to bed at about 9, he woke up at 10:30 and cried for 25 minutes, and slept until 7 the next morning.

Night three - I nursed Bug to bed at around 9:30.  He woke up and cried for about 5 minutes at around 1 AM and slept until 5.  I nursed him at 5 and he slept til 8.

Night four - No crying!  He slept from 9:30 - 6, nursed and slept until 8:30.

My baby Bug still loves me, even more than ever because he isn't so tired and crabby all the time! :)

We have been going on about a week, and some nights he will whimper for a couple minutes, but he goes right back to sleep.  I have been getting up between 4 and 6 to nurse him, and he will sleep for a few more hours.  But that is manageable!

His naps are also much better.  He has been taking one and a half to three hour naps two to three times a day.  So, so, so, so nice!

My main reason is writing this blog isn't to boast at what we did, but it is to help someone who was in my position.  I was exhausted and didn't know what else to do.  I was beside myself with terror and what would happen if I let my \precious Bug cry himself to sleep.  

I NEEDED someone to outline exactly what was going to happen.  My aunt told me down to the minute what happened with her baby.  And it really helped me to know what to expect. I would not have lasted as long as I did the first night if she would not have told me it took an hour and five minutes for the first night.  

It is okay to let your baby cry.  It will make your baby happier which in turn will make you happier!

That's all for now! 
Cassandra :)

May 14, 2014

Mesh Feeding Baby Bags... A Teething Solution

My little love Bug is TEETHING!!! His first tooth just poked through a few days ago, and life has been pretty miserable for him lately :(  I feel so bad for him.  But I just wanted to share some things that have been helping us get through the pain.


The first, and most amazing thing, is our mesh feeding bags.  THEY ARE A LIFE SAVER!! :)  The week before the tooth broke through, Bug could not get enough of cold, juicy watermelon and honeydew in his feeding bag.  He would chew and gnaw until there wasn't any fruit left.  

Once his tooth broke through, he really hasn't been interested in food AT ALL, but I have been putting ice cubes in the bag and he really enjoys that! 

These are the type of bags we have, and I love them!  For the most part, they are very easy to clean (except banana... I have been tempted to throw them out after putting bananas in them, but I just let them soak overnight and it seems to help).  But they have really been a great help to soothe teething pain!  And we also love them for when Bug just needs a snack and isn't in the mood for baby food.


The second thing that has helped is teething tablets.  I know that people have all different types of reactions to teething tablets because they are a natural medicine and not FDA approved.  But in my opinion, I would rather use a natural pain reliever than a medicine full of crazy ingredients. But that's just me.  
The tablets just melt in Bug's mouth in a few seconds.  I hold it under his tongue until they dissolve, and then I rub the powder on his gums.  They really do seem to give relief to his hurting mouth!


Frozen teething rings are also a huge relief.  Obviously, just throw these in the freezer and then let your baby bite and suck!  Simple :)


A warm bath has also helped us.  I know it may sound funny, but baths TOTALLY make my Bug chill out.  So if he is really fussy and nothing else is helping, I put him in the bath and it instantly relaxes him and once he is relaxed, his pain in more manageable.  


This tooth has been quite the upset for my Bug.  And to be quite honest, it is breaking my heart to see him in so much pain.  But these tips have helped make the pain much more bearable (for both of us)  :)

That's all for now!
-Cassandra

February 27, 2014

Cloth Diaper Fleece Liners

When I first started cloth diapers on my Bug, he hated the feeling of being wet.  Which I don't blame him for!!  So I changed him alot.  Which wasn't too bad, but then I had an idea...

I also was looking for something to act as a barrier for when I put on diaper cream, because I did not want to buy special cream for cloth diapers.  

I was reading a blog somewhere that said to cut little pieces of fleece and put them down so the diaper cream goes on that and not the cloth diaper. 

So I tried that and when I used diaper cream, it worked okay.  But the pieces were too small. (These have now become my wipes).

So I decided to buy more fleece and cut them to the size of a tri-folded prefold.


I have since discovered that if I always put a fleece line down it does two things...

1.  It wicks away the moisture from my little Bug's bum, helping him to feel more dry.
2.  Saves my diapers from getting super stained when he poops! :)  The sides get a little stained, which comes out after a few washed, but the whole thing stays fairly clean for the most part. 

I do only use these with prefolds because most other diapers on the market already have a wicking away liner.  


The coolest thing is that when I was looking for doublers and inserts online, I ran across fleece liners.  They are doing the same thing I am using them for.  But in my opinion, they are super spendy!  So I am feeling pretty good about myself for coming up with the idea on my own, and it is really a "real thing" for cloth diapers!  (Pat myself on the back! :) )

I bought one yard of fleece for about $6.00.  I didn't wait for a super great sale because I wanted it NOW! So it wasn't the cheapest, but I probably made about 60 liners or so.  So I still think I came out quite nice with the price.  

The fleece really does wash up nice to.  I haven't had any stains or anything and for the most part, it is still very soft and thick feeling.  

I will advise you to buy the fleece from a "good" fabric store like Jo-Anns or someting.  The first stuff I bought from Wal-Mart because Bug was super tiny and needed to eat alot, so when I was out and about, I couldn't be gone for that long.  So I got it at the one stop shop of Wal-Mart.  The fleece is thin, VERY stretchy and poor quality.  I am using this for my wipes, but I am very glad I got some better quality stuff for my liners!  

Ahhh... I just LOVE talking about all the great things about cloth diapering!  It is so much fun!

That's all for now!
Cassandra :)

February 26, 2014

Baby Food... Yum! Yum! YUM!!

My little Bug is 4 1/2 months old and he is so ready to eat some solid food! 

We have been trying rice cereal and oatmeal cereal for about 2 weeks now, and he LOVES it!  But I feel it is making him a little constipated... sorry for the TMI! So we are trying out some veggies starting this week.  My husband gave Bug a taste of the green beans while we were making it and he looked at him like "Dad, you're such a tease! Give me more of that!!!" :)

I decided to make all my own baby food purees.  When I first started looking into making baby food, the word "puree" scared me because it sounded so fancy!  (Insert slightly embarressed face here!)  But then I learned that it just means really really blended up baby food.  Just like the kind you would get in the store.


It is so much cheaper to make your own food and it is SO easy!  I made all the food listed below in about three hours give or take.  (Two hours for the veggies one day and one hour for the fruit the next.)

Hope you and your baby enjoy these veggies and fruits.

Green Beans
16 ounce bag of frozen green beans

Steam for about 20 to 25 minutes.  I got a new cookware set that has a steam basket with one of the pots, so I just used that.  It worked out really nice.  The water was green, but I feel like so much more of the nutrients stayed with the food by using the steamer and not just boiling them.  

Blend them in the blender until very smooth.  Add the water you used to steam as necessary.  My blender needs it really "sloshy" so I probably used about a cup to a cup and a half when making it.  But start out slowly adding water to avoid making it too runny!  


**I tried to use my food processor first, and I liked that you didn't have to add so much water (because I wanted to add breast milk to the food when I fed the Bug)  but it really didn't get it nearly as smooth and creamy as the blender. I think the food processor will be good for second and third foods when they don't have to be so smooth and the baby can handle some texture.  

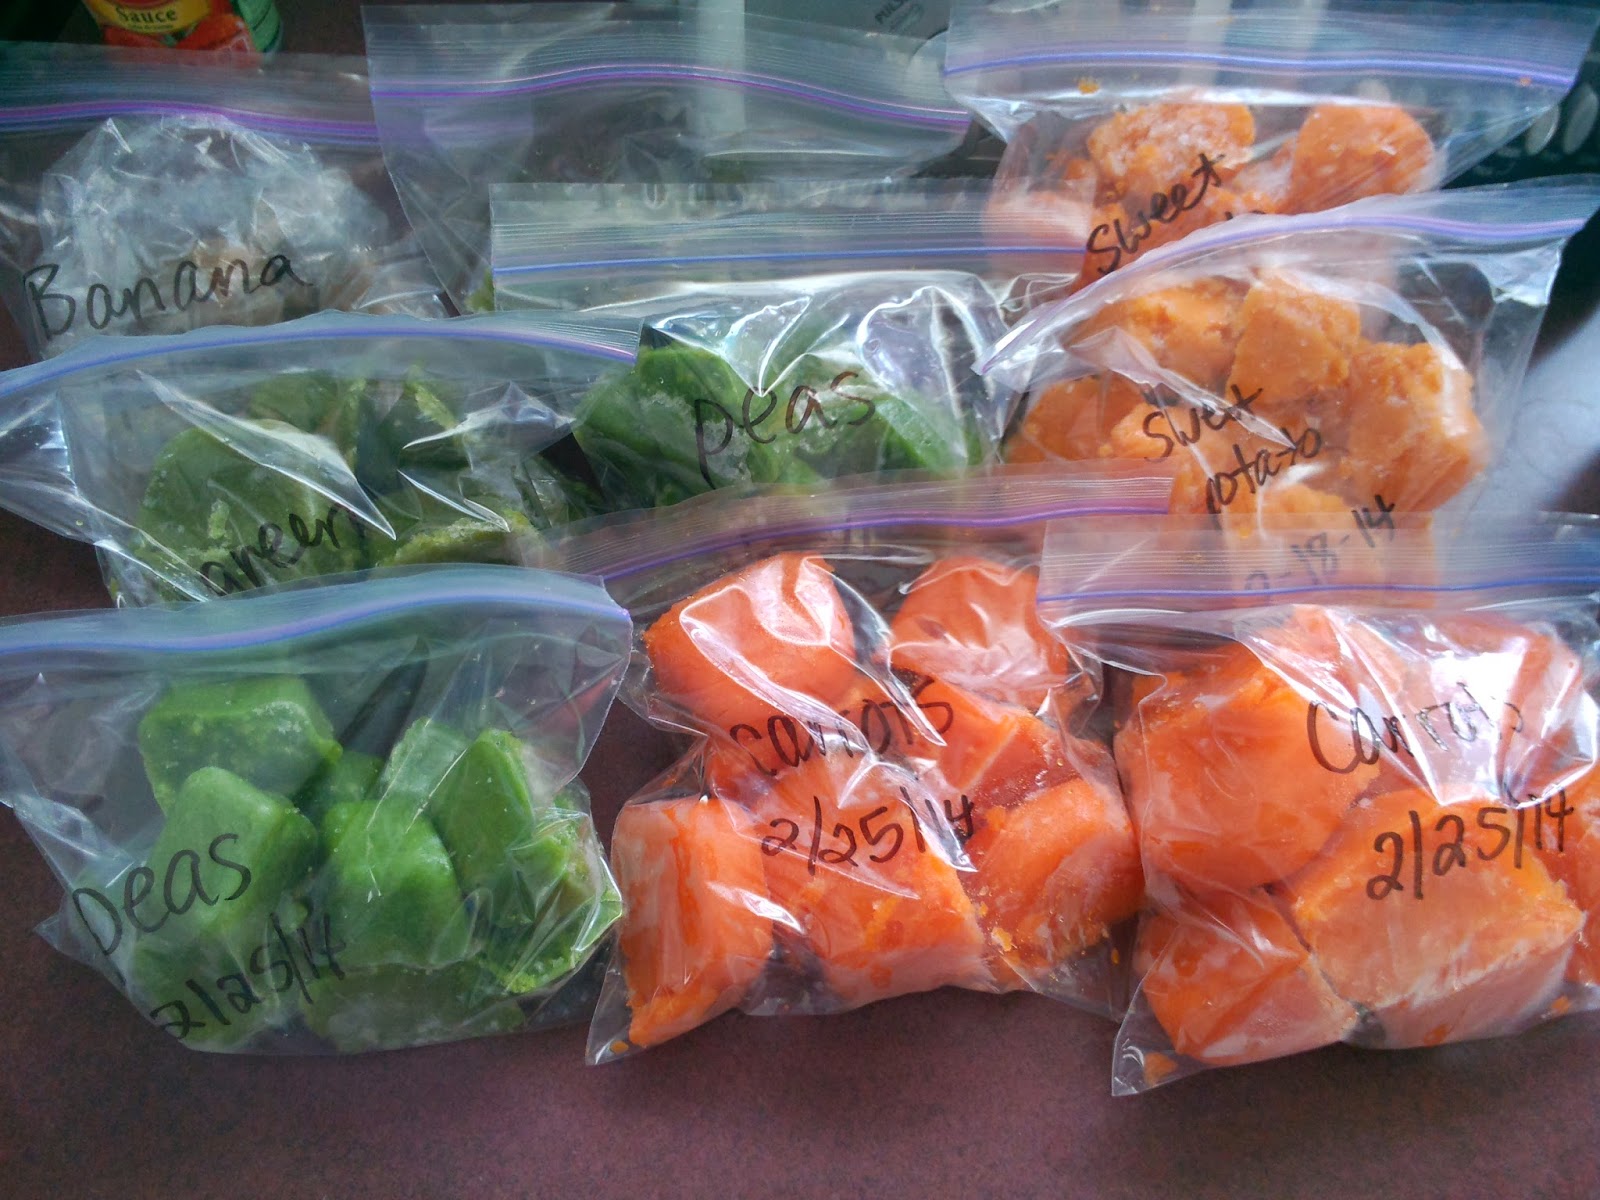
Pour or scoop the green beans into ice cube trays and cover with saran wrap and freeze overnight or for about four hours.  Once frozen, crack the trays and put in a ziplock bag and label with contents and date. 

Sweet Potatoes
2 large sweet potatoes - the orange kind (some call these yams)

I simply poked holes in them with a fork and then I put these on a piece of aluminum foil to avoid them dripping in the oven.  I baked them for about an hour or so. 

Once they are nice and soft, you can do one of two things.  Blend them with a little water, or just mash them with a fork.  

Once again, I feel like blending is good for first foods, and the mashing for later stage baby food.  If you do mash with a fork, you might want to cook them a little longer to get the sweet potatoes good and soft.   

Pour or scoop the sweet potato into ice cube trays and cover with saran wrap and freeze overnight or for about four hours.  Once frozen, crack the trays and put in a ziplock bag and label with contents and date. 

Peas
16 ounce bag of peas

Steam for about 20 to 25 minutes.


Blend them in the blender until very smooth.  Add the water you used to steam as necessary. I used about a cup of water for the peas. 


Pour or scoop the peas into ice cube trays and cover with saran wrap and freeze overnight or for about four hours.  Once frozen, crack the trays and put in a ziplock bag and label with contents and date. 

Carrots
2 pounds of "real" carrots, not baby ones

Peal and cut the carrots into about two to three inch pieces.  Steam for about 45-50 minutes.  Depending how big or small your pieces are will depend on your cook time, but you want them to be very soft.


Blend them in the blender until very smooth.  Add the water you used to steam as necessary. I used about a half cup of water for the carrots. 

Pour or scoop the carrots into ice cube trays and cover with saran wrap and freeze overnight or for about four hours.  Once frozen, crack the trays and put in a ziplock bag and label with contents and date. 

Apples
5 pounds of Braeburn apples - I used these because they are nice and sweet and not tart, but any kind would work.

Peel, core and quarter the apples.  Place into your pot and let them steam for about an hour.  You can add about a cup of water, but as the apples cook, they will get liquid-y. 

Once they are soft, scoop them into the blender and puree.  You should not need to add any extra water, but if you do, that's fine too!

Pour or scoop the apples into ice cube trays and cover with saran wrap and freeze overnight or for about four hours.  Once frozen, crack the trays and put in a ziplock bag and label with contents and date. 

** I made a first batch of apple sauce with just putting the whole apple in the pot.  That's what I generally do when I make apple sauce.  But I usually use a food mill, and that really mashes everything up.  When I put it in a blender using the whole apple, it did not blend up the seeds and the core stuff really well.  So needless to say, the first batch can not be used for baby.  But adults could eat it.  Just a bit of insight so you don't make the same mistake as me! :)

Pears
2 pounds of fresh pears and two cans of pears in light syrup.

Peel, core and quarter the pears.  Place into your pot and let them steam for about an hour.  You can add about a cup of water, but as the pears cook, they will get liquid-y.  I cooked the fresh and canned pears separately.  Mainly because I wanted to see if they were different.  The were not different tasting, just different in color a little bit. They could be done together if you wanted to. 

Once they are soft, scoop them into the blender and puree.  You should not need to add any extra water, but if you do, that's fine too!

Pour or scoop the pears into ice cube trays and cover with saran wrap and freeze overnight or for about four hours.  Once frozen, crack the trays and put in a ziplock bag and label with contents and date. 

Bananas 
**I made bananas buy mashing them with a fork and then freezing them like the rest of the food, but when I un-thawed them, they tasted rotten.  Not sure if that was a freak thing, because I know others who freeze them, but I just make them fresh each time because they can very easily be mashed up with a fork!

I had so much fun making the baby food!  And it really was so simple!  I also love knowing that my little Love Bug is not eating fresh food that his mommy made for him with love! :)


Here is a breakdown of prices...

Green beans - $1.00 - made 15 one ounce cubes
Peas - $1.00 - made 18 one ounce cubes
Carrots - $1.69 - made 22 one ounce cubes
Sweet Potatoes - $2.12 - made 27 one ounce cubes 

Apples - $4.40 - made around 50 cubes!
Fresh pears - $2.24 - made 18 cubes
Canned pears -  $0.96 - made 18 cubes 

So as you can see, a huge money saver too! Most baby food is about one dollar per can/container.  And let's say you  baby makes two meals out of one container, that's 50 cents a meal.  This is crazy cheap when comparing!

Hope you enjoy making your baby food as much as me!  I just can't wait to start mixing flavors! :)

Have fun!

Cassandra :) 

February 20, 2014

Cloth Diaper Washing Routine and Detergent

One of the big choices when using cloth diapers is how to wash them.  This can be a little daunting at first, because I mean, come on... you are washing poop... in your washing machine... that washed all your other clothes!  Kind of gross! :)

But I promise, it is not that gross.  And it really isn't all that hard either!  

Like said in my cloth diaper 101 post, I am not saying this is the greatest way to wash cloth diapers... this is just what works for our family.

We use a wet/dry pail method.  This means that some diapers get put in the pail wet and some get put in dry.  We use a garbage can from Target with a press down latching lid.  I use lemon scented garbage bags to line the pail. I know, I know! Bad mommy for using bags and not a reuseable liner.  But honestly I am using cloth diapers for the money saving aspect, not the environmental aspect and in the long run, I think using disposable bags will be cheaper than buying diaper pail liners.  Diaper pail liners are anywhere from 18 to 30 dollars each and I would need to get two of them so you can use one while the other is washing.  I bought 75 garbage bags for less than 4 dollars and I use one every two to three days.  So about 8 - 10 dollars per year and hopefully diapers for only two years... you do the math! :)

But back to the wet/dry pail!  We have the pail in our bathroom next to the toilet.  We change Bug's diaper in his room, and then bring the diaper to the bathroom.  If it is just a wet diaper, we simple put it in the pail.  If it is a messy diaper, I either spray it off with the diaper sprayer, or rinse it in the sink.  If it is really runny and gross like breastfed baby poop can be sometimes, I just rinse it in the sink because I would fill my toilet up three times using the diaper sprayer because the poop just stays on the diaper and you have to use so much spray to get it off.  I leave these messy diapers pretty wet when I put them in the pail, trying to leave as much water as I can in them to leave them wet until wash day.  This helps the stains to not set in.  

My husband made this wonderful diaper sprayer but you can buy them online also.

I also take all the diapers inserts out right way so I don't have to do it before I put them in the washer.  Digging through diapers that have been sitting for two days does gross me out! :) So I always make sure to have everything wash ready before putting it in the pail!

On wash day I bring the bag down stairs and and put it in the washing machine.  I also throw in a towel to help swish things around.  I usually end up only filling the washer up half full with diapers, so I just feel like the towel helps to agitate them more.  I use a full load setting of water and do a cold rinse.  Water cleans diapers!  I find it best to put it on a full load regardless of how full of diapers that washer is. 

After the cold rinse, I put in detergent and do a hot wash, cold rinse cycle.  Some people say to do another rinse after this to make sure all the detergent is out, but I really don't find it necessary.  My little Bug doesn't have rashes and my diapers do not repel, so I am pretty sure all the detergent is out. But if you have either of these problems, you might want to do another rinse. 

Then I throw everything in the dryer.  I use the longest dry cycle on the hottest setting.  My fitted and hemp liners don't get dry all the way so then I just set them out to finish drying.  I know some people say to pull out the covers because heat isn't good for them, but so far I am not seeing any problems with the covers.  They still look and work good as new.  So for simplicity sake, I will continue to put them in the dryer.

The detergent I use to homemade, but it's nothing fancy.  I just decided to use it once again because of the money saving factor.  Buying cloth diaper detergent is expensive!  And I didn't want to just use regular detergent because I know that can cause repelling issues.  So I made my own. 


Here is my recipe...

1 cup Washing Soda
1 Cup Borax
1/2 cup Oxi-clean free or baby

Simply stir them together and you have a cloth diaper detergent!  Easy-peasy lemon-squeezy! :)


I tripled the recipe and it lasted me 3 1/2 months.  I use about 2-3 tablespoons per load.  


I wrote the recipe on a piece of paper and taped it to the top of my container so I always have to ready to go and easy access to it.


I do still have some staining, but nothing too bad.  And usually a few washed will get the stain out totally!  Once summer comes, I am going to try sunning my diapers because I have read that takes stains out.  But for now, it is winter in North Dakota, so no sunning diapers for me! :)  

 I hope you are enjoying the wonderful world of cloth diapering as much as I am!  
Cassandra :)

P.S. - I know there is some controversy over using borax.  But it is only dangerous if it is ingested by a child.  Well two things...
1.  All the detergent is washed out of the diapers
2.  My Bug is not sucking on his diapers!
So for me, it really isn't a concern, but if it does bother you, there are many other simple recipes for cloth diaper detergent you can use.  


Cloth Diapering 101

When I started out on this whole cloth diaper experience, I was new to EVERYTHING!! And it seemed that there was so much to learn. And not only so much to learn, but it seemed that every blog I read had a VERY different opinion on everything related to cloth diapering. And as a new mom, it was completely overwhelming.  In fact, if the prospect of cloth diaper didn't sound so wonderful to me, I probably would have just used disposable diapers because I seriously was so confused by all the lingo, ideas, ways to do things, and types of cloth diapers. :(

And that right there my friends makes me very sad.  Looking back to where I was four months ago and my feelings of despair and nervousness over cloth diapers makes me not want any mom to have those feelings. 

I think the reason why there are so many different ways to do cloth diapers is because there are so many different types of families!  What works for my family might not work for your family!  But the way that some families express their views on the subject as "my way or the highway" makes them sound like the ultimate authority on cloth diapers.  And let me tell you, they are NOT the authority!! YOU ARE!! You have to do what is best for your family! Plain and simple!

So without trying to be too authoritative and over-bearing ;) I'm going to tell you what I use for cloth diapers.

Most of the cloth diapers we use at our house are prefold diapers with a cover.  
When Bug was a newborn, we used Osocozy newborn (yellow trim) prefolds and Real Nappy covers. Once he started to leak with the newborn size, I ordered the medium sized Osocozy prefolds.

When using prefolds, I do not use pins or snappies.  I just fold the diaper into thirds and lay it in the cover.  I don't know if I just didn't get big enough diapers, but I could never get them to fit around him doing a tradition fold around his tummy.  I like the simplicity of just folding them into thirds and laying them in.  Most covers have a flap to keep the prefold in place. 


For over night diapers, we used Alva Baby pocket diapers with the inserts that came with.  The link above to this dino diaper was our favorite, and I loved the inserts that come with it! 
I ordered more Alva Baby diapers from shopdiaper.com and they came with different inserts.  These inserts did NOT work for the Bug and I ended up trying some different things that I will talk about later.  

But low and behold, our over night diaper system did not work anymore.  We realized that Bug was holding his pee and then would pee a lot all at once, and the pocket diaper lining could not handle that fast of pee.  So we tried putting a prefold inside a pocket diaper and that seemed to work, but that much fabric on a 1 1/2 month old looked absolutely crazy and uncomfortable.  So I went in search of another solution...

And I found the world of fitted diapers.  A fitted diaper is basically a prefold made into a whole diaper.  So no matter where the pee goes, it will get soaked up with the cotton.  You have to use a cover with these because it is just cotton material.  
And I also found out that cotton and natural fibers absorb much better for heavy wetters than synthetic materials like microfiber. 

  The fitted diaper I chose to go with was the Thirsty Duo Fab Fitted diaper.  It is quite a mouthful, but they are pretty great!  It is not a regular fitted diaper because it is not prefold material. In fact, I'm not even sure what it is made of, but it is SUPER soft, highly absorbent, and it works wonders for us!  It also it pretty affordable compared to most fitted diapers!  You can stuff them with an insert, but you don't have to.  I use Thirsty doublers or hemp inserts.  I ordered two just to try, and I loved them, so I ordered two more.  By pairing this with a cover, we have not had any leaks at night time!

As our Bug got bigger, we needed some bigger covers.  I went mainly with Diaper Safari covers and a couple Thirsty covers.  I still use the medium Osocozy prefolds and as of right now, my four month old Bug is doing great with the medium size. 

I use pocket diapers now mainly when Bug has an afternoon with a Grandma or Auntie, or when we are going out shopping or to church.  


I love how adjustable the Alva Baby pocket diapers are!  They really are a great diaper to use and use and use as your baby grows and grows and grows!

Now like I said above, the inserts I got with my second order of Alva Baby diapers were JUNK!  So I ordered some hemp inserts.  Well, I did not know that while hemp is super absorbent, it is SLOW absorbing, and since I have a fast peeing baby, this was not working at all.  So I did some more reading and found Thristy Doublers. I absolutely love these colorful, absorbant, amazing pieces of fabric! :)


I have been using a doubler and a hemp or original insert I got with the Alva Baby diapers together.  This seems to work really well.  

So that is how we cloth diaper in our house.  This is what works for us.  It might not work for you.  The key with cloth diapers is trial and error.  For someone who does not like to experiment (I just want it to work the first time), this can be hard.  But it is also very rewarding when you find what works for you!

Here are the amount of diapers I currently am using for my four month old little Bug...

7 Diaper Safari snap covers
2 Thirsty Duo Snap Wrap covers - size two
1 Rumparoo Cover - size one

12 Osocozy prefold diapers - medium
6 Gerber prefold diapers - not my favorite, but use them when I don't have laundry done.
6 Osocozy unbleached prefold diapers - size 1 - almost too small 

4 Thirsty Duo Fab Fitted diapers - size two

9 Thirsty Fab Doublers - large
2 Thirsty Hemp Inserts - large
3 Baby Kicks Hemp Inserts - medium
4 Inserts from Alva Baby diapers - I really have no clue what these are made of or how to get more besides ordering individual diapers off amazon.

8 Alva Baby pocket diapers
3 Shop Diaper pocket diapers 
1 bumGenius 4.0 pocket diaper

I have more diapers than I probably need, but I only have to do laundry every two days.  And that my friends is FABULOUS!  :)

I know that is a lot of information!  But that is what we do.  Remember, try new things and see what works for you!  But also remember to not order a whole lot of one type until you try it first.  A diaper one person might rave about, might not work for you baby.  So try a few and go from there.  

Cloth diapering is so much fun!  I love how my Bug's bottom is always free of redness and I love the fact that I'm not putting chemicals on his little bum.  

Hope you are able to find what works for you! If you have questions, feel free to comment! I'd love to talk with you! 

Cassandra :)

February 10, 2014

The Crazy World of Starting Baby on Solids

It seems to me that everyone on the Internet has a different opinion on what to do with your baby.  On everything from diapers to feeding to sleeping to playing to everything!  

I don't know about you, but every time I have an issue with my babes, I turn to the Internet and search and search and search for an answer, and every answer I get seems to contradict and be the opposite of the last answer I read.  It can make a new mom go CRAZY!!

And these differences in opinions that everyone seem to have are not just little, simple articles with suggestions, they are my way or the highway, I am the only right person, do what I say or you are a bad mom articles.

And all I'm trying to do is be a good mom and do what's best for my baby, and usually end up more confused and frustrated after searching the Internet then I was before.  

This is what happened with the whole idea of baby food.  And so from here on out, I am going to try something new and go with my motherly intuition and do what I think to be best for my little bug.  I am not saying to throw caution to the wind and do whatever I feel, like feed my baby a T-bone steak at 3 1/2 months old, but by doing a little research, asking some "real life people" and not the Internet, I am going to find solutions for my baby problems. 

So back to the topic at hand... starting solids. Here is a little bit of my story as to why I wanted to start my little Bug on solids.

I Love this little girl's facial expression! :)
My love Bug has really never been a great sleeper.  I consider it a great night if he sleeps for one four to five hour session.  Before and after that one long sleep, it is usually up every hour or two.  With that being said, he used to wake up just kind of fussing for me to get him.  About two weeks ago, he started waking up SCREAMING after a couple hours of sleep!  I would quickly go get him, pick him up and he would start sucking on my shoulder because I usually wear a tank top and he thought it was something other than my shoulder! ;)

He would nurse a little bit and fall back to sleep with in about 5 to 10 minutes, without really getting a good feeding in, then he would sleep for 45 minutes, wake up starving, eat a little bit and crash out again, and sleep a little... and this would continue for the rest of the night.

Needless to say, we were both exhausted after about a week of this!  I knew I was still producing enough milk because I still had milk left once he was done eating and feel asleep, and he was only eating off of one side.  So my supply wasn't my issue.  And after talking to my mom and my mother-in-law, I decided that maybe he was ready for a little something more before bed.

So then I read on the Internet and there were some VERY passionate articles about starting your baby on solids before 6 months.  I felt like a horrible mom!  Why would I even think about starting my baby on solids at 3 1/2 months old?!  And starting him on rice cereal of all things.  I should be locked up for the monster that I am!  Well that's pretty much how I felt after reading these articles.

But then my wonderful, trustworthy voice of reason know as my husband stepped in and made me think about our situation a little bit.  Here were some things we discussed...
*Isaac was born a week past his due date so he was almost 4 months old, closer to 4 than 3
*Both of us started rice cereal when we were 3 months and don't have allergies or anything
*My husband's brother started eating cereal at 1 1/2 months because he was just SO hungry all the time!
*Our boy is growing like CRAZY!  I put clothes away all the time that don't fit him!  He is 3 months, 3 weeks old right now and hardly fits into 6 month clothes, I am just getting ready to wash his 9 month clothes!
*All babies develop differently!  4 to 6 months is a guideline for feeding.  Not everyone gives birth to a baby of a strapping (and handsome) farm boy!  My husband's family is BIG!  There are a lot of very tall men on his side who eat a lot of food!
*He is hardly eating any cereal (less than a tablespoon) and it is mixed with breastmilk and made very runny.
*I am his mommy and I know him best, not some article on the Internet! - this is the most important one!

And after thinking about all those factors, I decided I would try feeding him some rice cereal.

The first night he thought it was pretty yummy :), but it didn't help with sleeping at all. :(

The second night he really didn't like it a whole lot, and it didn't help with sleeping and his tummy was pretty upset and I had to give him gripe water.  I kind of became discouraged because I really wanted this to be a solution for our sleep situation.

The third and fourth night I skipped because I didn't want it to hurt his tummy again.  And of course I turned back to my hateful Internet friends to tell me what a bad mom I was!  But then my own voice of reason set in and said, this is something brand new for your baby! His tummy is going to have to get used to it a little bit!

So I tried again on the fourth night and my little Bug loved it!! He was pushing my hand with his hand to his mouth to get the cereal in there faster and if I didn't go fast enough, he started to cry!  And he had a normal messy diaper without having to have gripe water! His sleep was a little better, but not great.

The fifth night once again he loved his runny rice cereal!  He finished the one tablespoon cereal mixed with 3 tablespoons breast milk and wanted more!  But I didn't want to push a good thing too far, so I didn't make more.  And the best part is his sleep!  He slept for 2 1/2 hours, then FOUR HOURS!!!, then 2 1/2 more hours.  That may not sound that great, but that is the first time I had slept more than 3 hours straight in a long time!  I felt so rested after that four hour stretch!  He woke up this morning feeling happy and playful and we have been having a great day!:)

So I guess I am writing this blog entry to help moms out there like me.
Maybe you aren't too confident in your mommy skills yet, and feel like you don't know what to and are turning everywhere for answers.
Maybe you have been searching high and low on the Internet and in books to give you answers.
Maybe you are sleep deprived and looking for a solution.

I say this to you, follow your heart.  You are the mommy and you are the one who knows your little love best.  You can read him better than anyone!  A mother's instinct is a real thing, and God has equipped us mommy's to know what is best for our babies.

Believe in your self and do what you believe to be best for your baby! Your baby needs you to listen to his cues, the cues that only you as mommy know!  He loves you so much and he has the confidence in you to do a wonderful job of bringing him up to be a happy, healthy kiddo!

I pray this gives you encouragement and peace!
Cassandra :)

January 8, 2014

How to Make Your Baby Sleep Advice... Or Something Like That!

There is so much advice out there for new moms. Everyone seems to have a "right way" to do things. And since every baby is different, I think there really is no right or wrong way, just do what works best for you and your baby!


And that's what brings me to today's post...

Now that Isaac is 12 weeks old, I have been thinking of getting him on a loose schedule. I am not talking a minute by minute schedule, but just something with a little routine in it so I can plan my days a bit instead of flying by the seat of my pants. (But I hear that's just the life of a mom! :) lol!) 

I had been wanting to do this right before Christmas, but I knew that the Holidays would be all over the place, so I waited until all that was over. 

And now they are over, and he is going through his three month growth spurt, so any form of regularity we had is OUT THE WINDOW!

While on babycenter.com today, I saw this post and this is exactly what I feel like right now! So many ways to do things. It gave me a chuckle, so I just had to share! :)


"You shouldn't sleep train at all, before a year, before 6 months, or before 4 months, but if you wait too late, your baby will never be able to sleep without you. College-aged children never need to be nursed, rocked, helped to sleep, so don’t worry about any bad habits. Nursing, rocking, singing, swaddling, etc to sleep are all bad habits and should be stopped immediately.

Naps should only be taken in the bed, never in a swing, car seat, stroller, or when worn. Letting them sleep in the car seat or swing will damage their skulls. If your baby has trouble falling asleep in the bed, put them in a swing, car seat, stroller, or wear them. Use the crib only for sleep and keep it free of distractions. If the baby is having trouble adjusting to the crib, have them play in it first. If the baby wakes up at night and wants to play, put fun toys in the crib to distract them.Put the baby in a nursery, bed in your room, in your bed. Co-sleeping is the best way to get sleep, except that it can kill your baby, so never, ever do it. If your baby doesn't die, you will need to bed-share until college.

Keep the room warm, but not too warm. Swaddle the baby tightly, but not too tightly. Put them on their backs to sleep, but don't let them be on their backs too long or they will be developmentally delayed. Give them a pacifier to reduce SIDS. Be careful about pacifiers because they can cause nursing problems and stop your baby from sleeping soundly. If your baby sleeps too soundly, they’ll die of SIDS.

Don’t let your baby sleep too long, except when they've been napping too much, then you should wake them. Never wake a sleeping baby. Any baby problem can be solved by putting them to bed earlier, even if they are waking up too early. If your baby wakes up too early, put them to bed later or cut out a nap. Don’t let them nap after 5 p.m. Sleep begets sleep, so try to get your child to sleep as much as possible. Put the baby to bed awake but drowsy. Don't wake the baby if it fell asleep while nursing.

You should start a routine and keep track of everything. Don’t watch the clock. Put them on a schedule. Scheduling will make your life impossible because they will constantly be thrown off of it and you will become a prisoner in your home. Using the "Cry It Out" method (CIO) will make them think they've been abandoned and will be eaten by a lion shortly. It also causes brain damage. Not getting enough sleep will cause behavior and mental problems, so be sure to put them to sleep by any means necessary, especially CIO, which is the most effective form. CIO is cruel beyond belief and the only thing that truly works because parents are a distraction.

Formula and solid foods will help the baby sleep longer. Solid foods shouldn't be given at night because they might wake the baby. Don't stop the baby from nursing when asleep. Be wary of night feeds. If you respond too quickly with food or comfort, your baby is manipulating you. Babies can’t manipulate. Babies older than six months can manipulate.

Sleep when the baby sleeps. Clean when the baby cleans. Don’t worry. Stress causes your baby stress and a stressed baby won't sleep."


This is exactly what day to day feels like in my life right now... so much information and I never know what is best. So today, after reading this article, I have decided to just do what feels right for me and my little love bug! :)

Hope this brings a smile and is a reminder to all moms that you really do know what is best for baby! Just follow the signs of your little one and do what your heart tells you!

-Cassandra